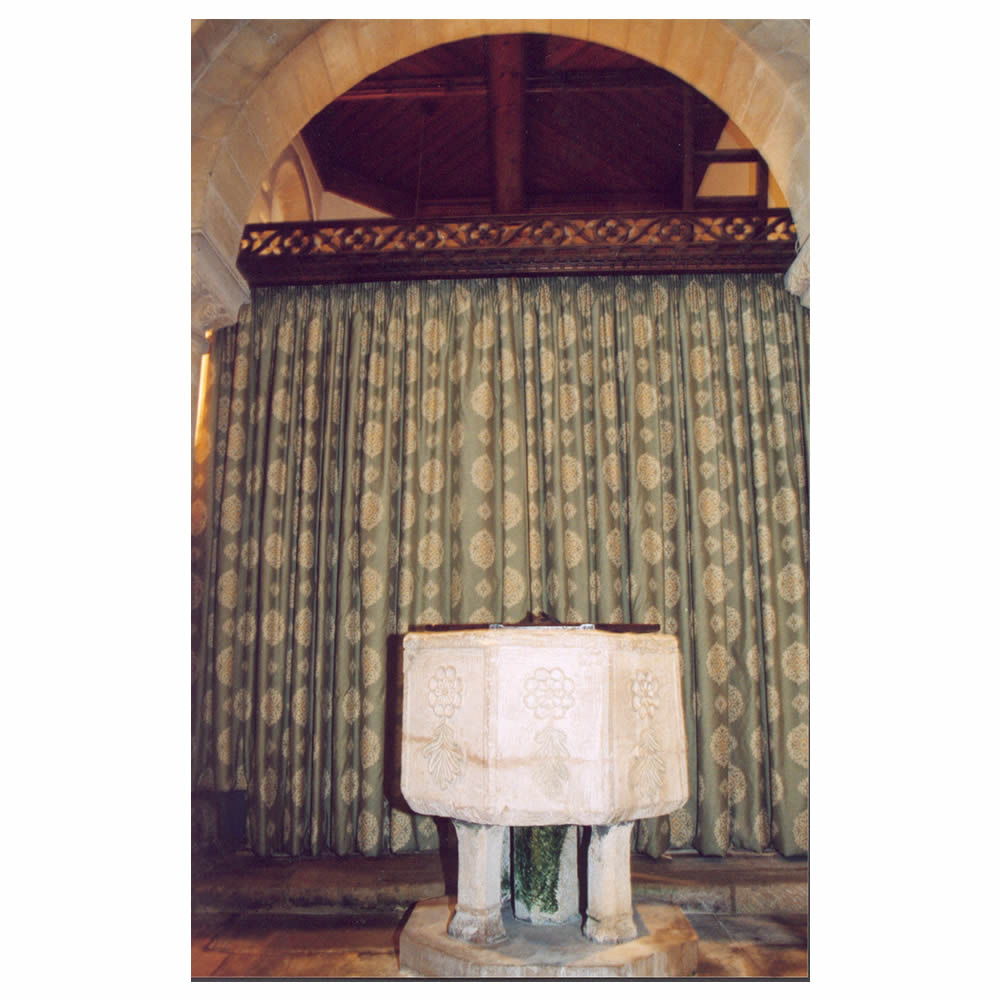
Fig C1 (Fig 17c) The Font and Rood Screen Carving
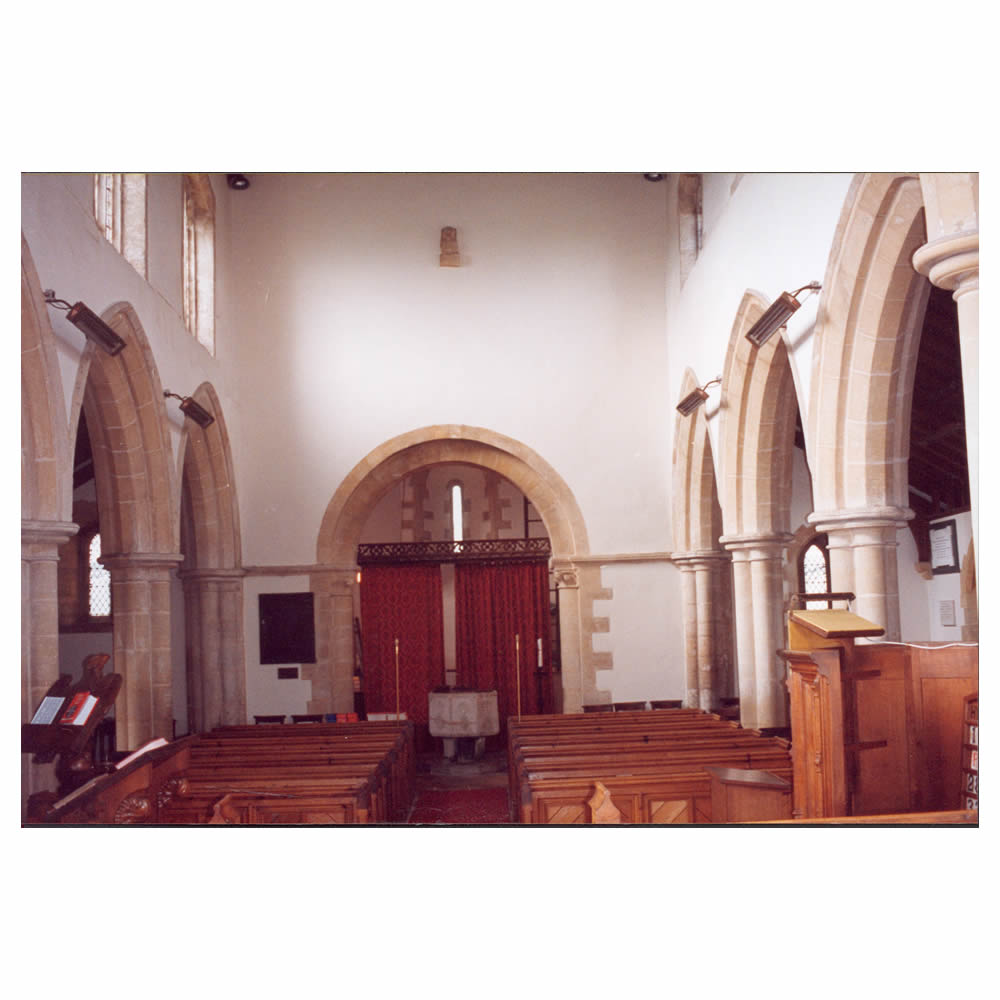
Fig C2 (Fig 17d) The Nave and Clerestory
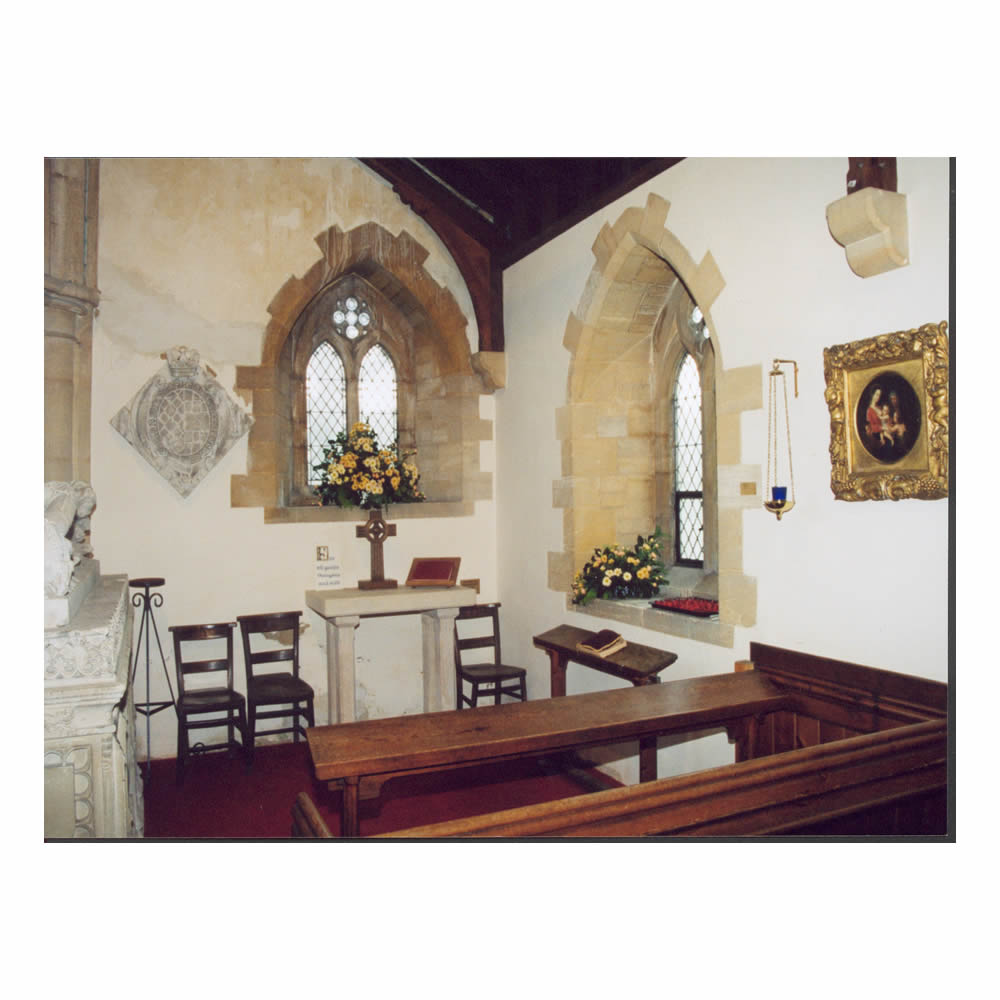
Fig C3 (Fig 17e) The Lady Chapel, showing the original 13th Century window
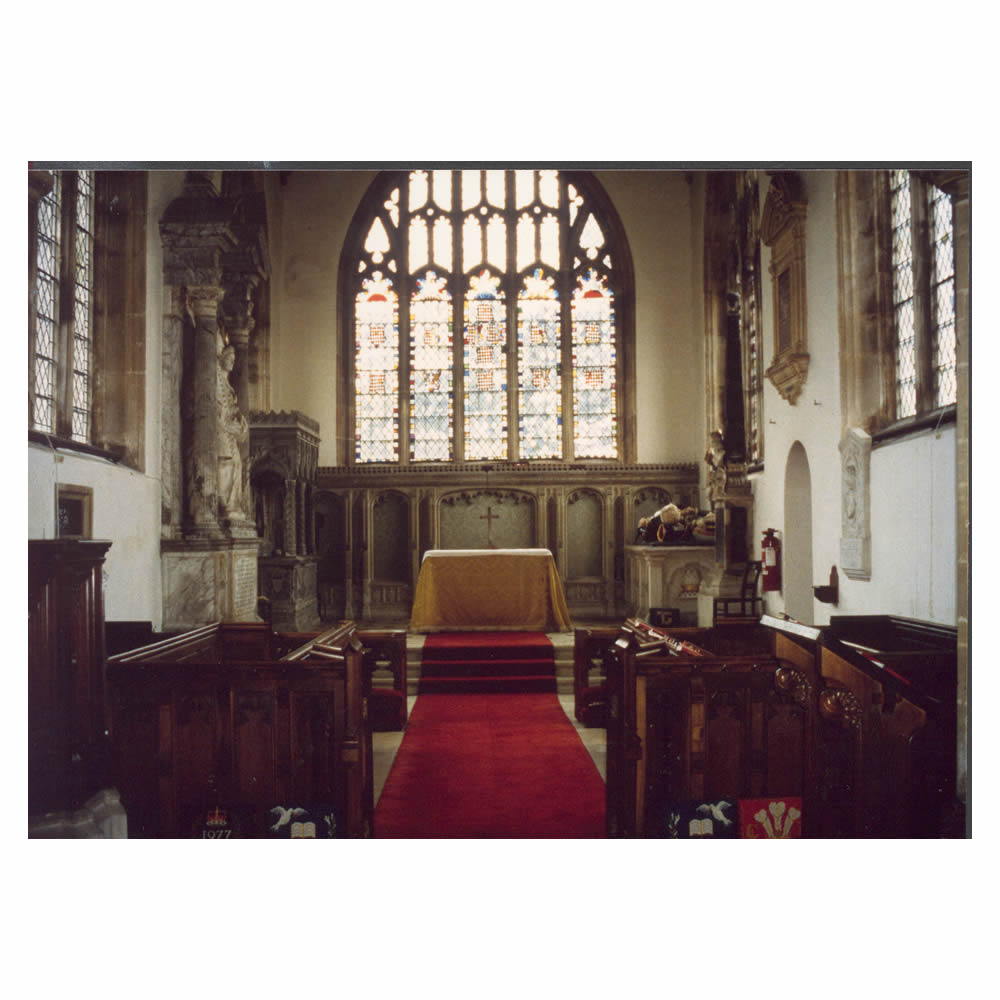
Fig C4 (Fig 17f) The Chancel and East Window
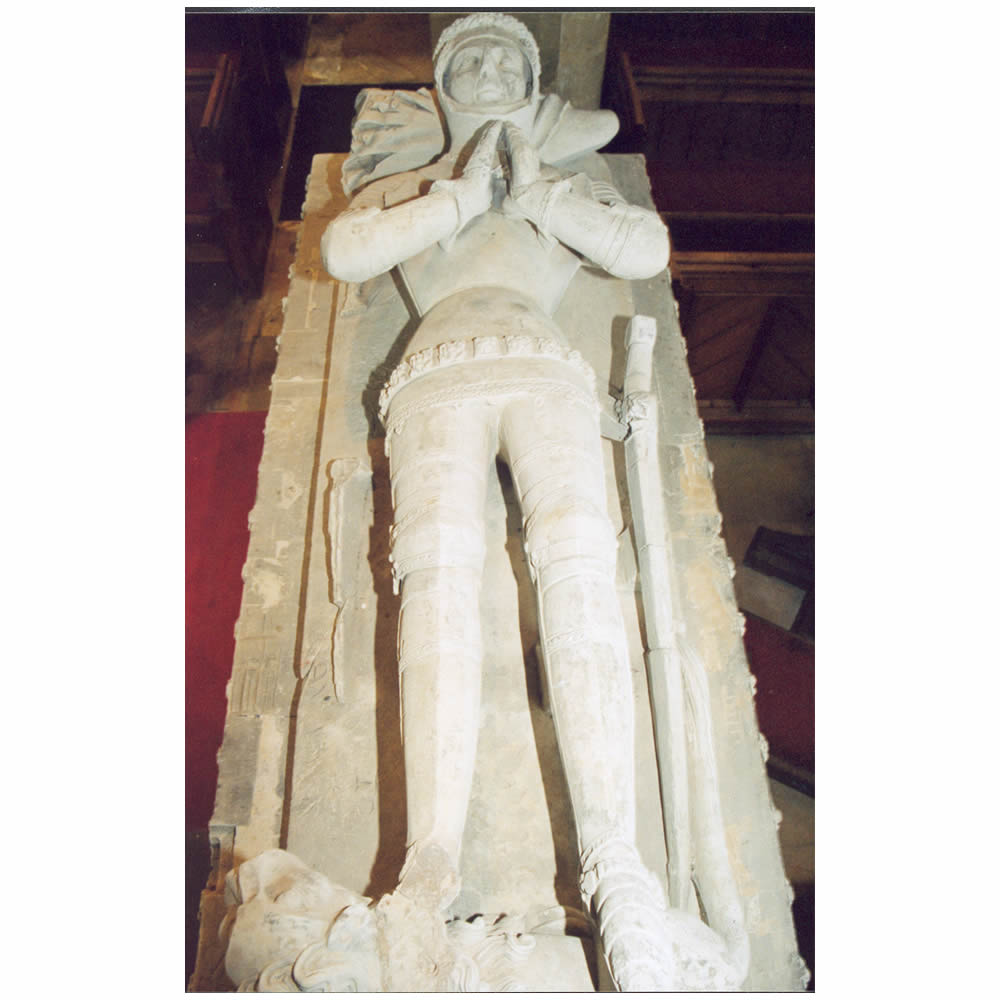
Fig C5 (Fig 17h) Engraving of Effigy of Sir John Wittlebury in recessed arch
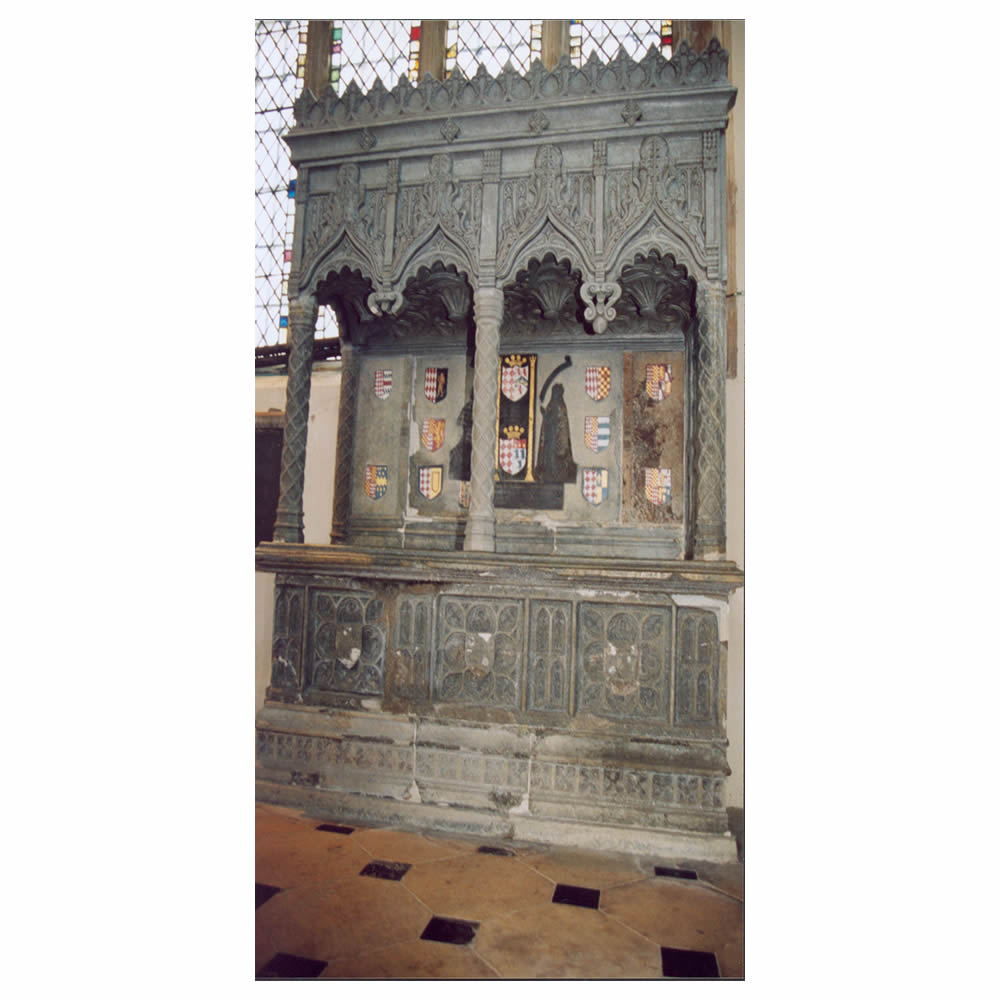
Fig C6 (Fig 17i) Tomb of Sir William Fitzwilliam
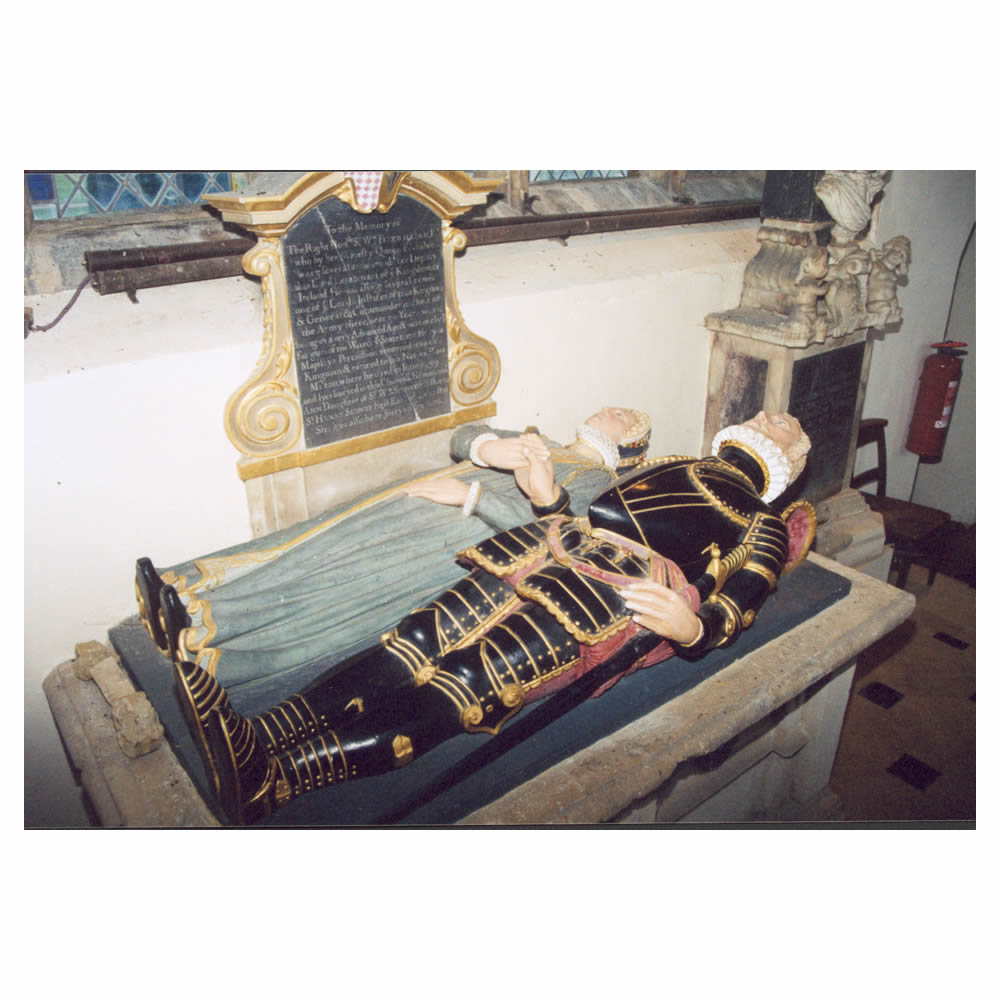
Fig C7 (Fig 17j) Tomb of Sir William Fitzwilliam and Lady Anne
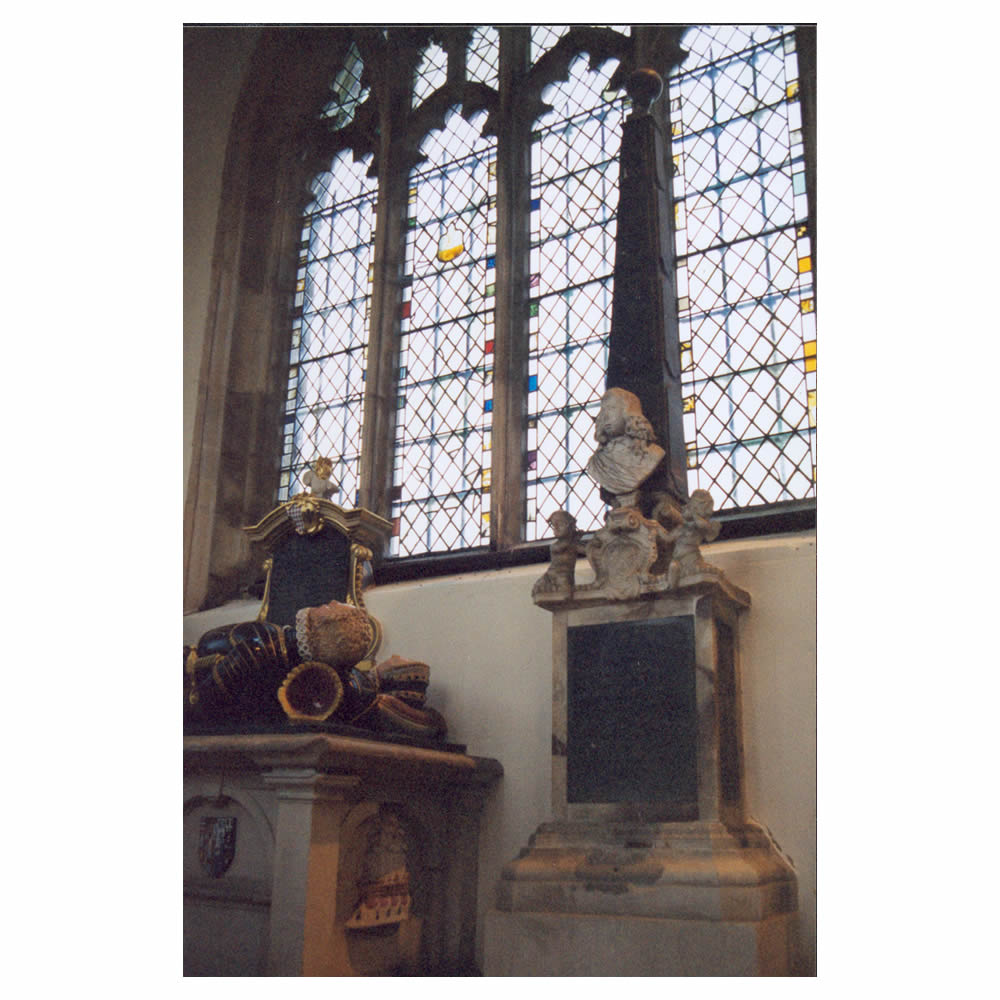
Fig C8 (Fig 17k) Tomb of Edward Hunter
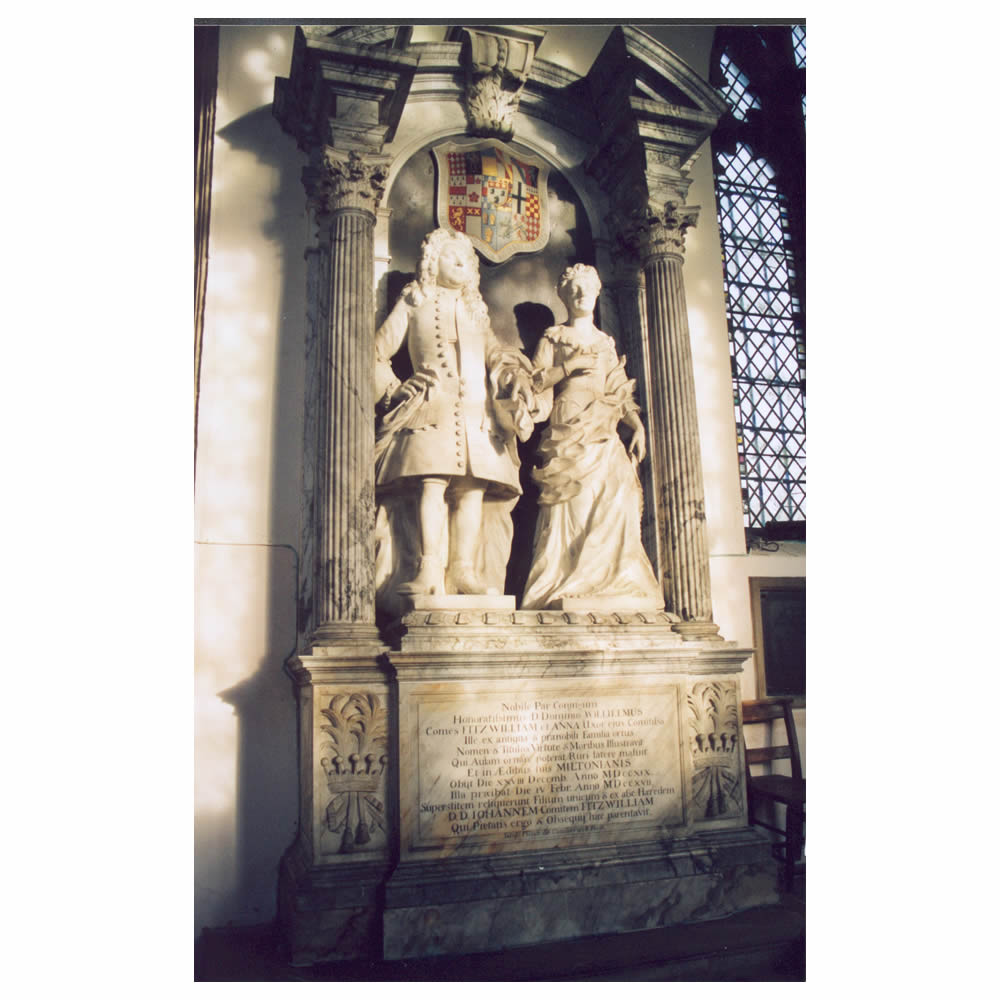
Fig C9 (Fig 17l) Tomb of 3rd Earl Fitzwilliam by Fisher
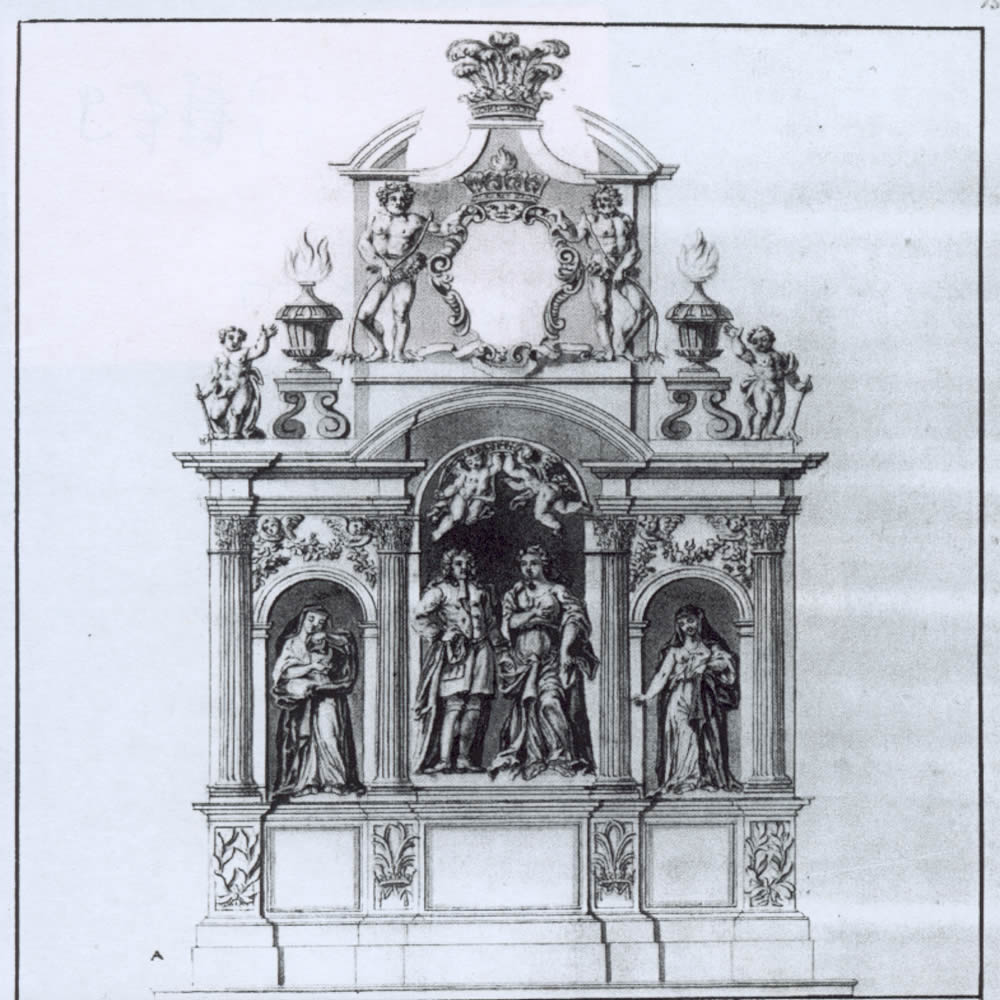
Fig C10 (fig 17m) Drawing of the Fisher monument of the tomb of the 3rd Earl Fitzwilliam as it was when originally installed. At some stage the figures either side were removed, perhaps during the Victorian 1850s restoration?
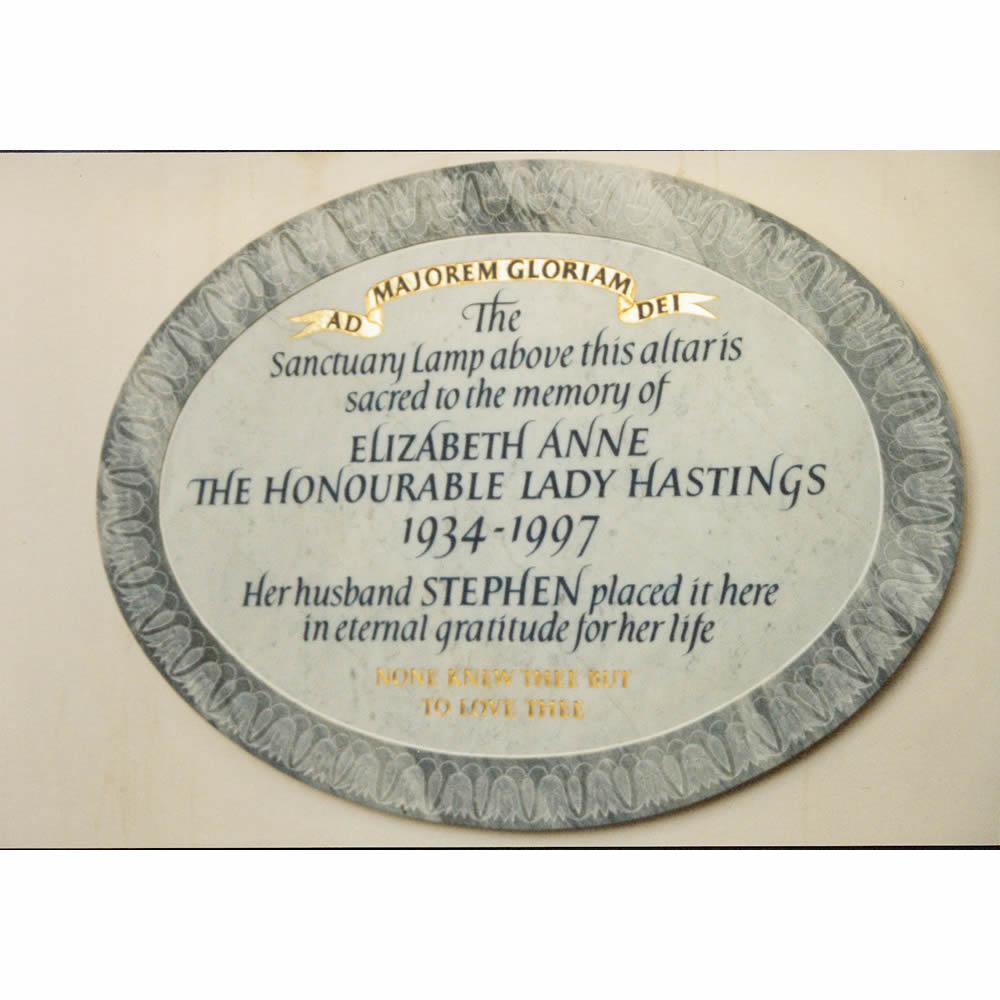
Fig C11 (Fig 17n) The Hon. Lady Hastings’ Memorial Plaque